Full local install of the Olympe Platform
If you are interested in testing your ideas in DRAW, the Olympe Community offers free on-premise access to Olympe DRAW, without any installation step required. If you are not already a member of our Community, go ahead and register to unlock the potential of DRAW.
If you would like to code to create your own bricks, then the below procedure will guide through the necessary steps to install CODE locally. And if you code a cool brick, share it with us in the Community 😊
Full local install of the Olympe Platform
This tutorial guides you through the full install of the Olympe platform locally.
It is a fully autonomous setup where all services execute locally independently of any distant web service.
This means the platform is never automatically upgraded to the latest version and no collaboration is possible with anyone on a given project.
The following main modules will all execute on your local machine
- DRAW & webpack server
- CODE
- Orchestrator
- RabbitMQ
- Neo4J graph database

Prerequisites for installing Olympe
You will need to have the following installed:
- Docker Compose
- Node.js 14.13.1 or greater
- Note: while npm is also needed, it comes directly whenever Node.js is installed
- Yeoman 4.1.0 or greater (can be installed with
npm install -g yo) - Your favorite IDE e.g. Visual Studio Code
Steps short version
Olympe Yeoman generator, create project, start backend, reset DB, start DRAW
Use this short version if you know what you're doing.
If it your first time here, please proceed with the detailed version.
Install the Olympe Yeoman generator
npm install --global @olympeio/generator-project
Generate an Olympe project
- create an empty folder where the Olympe platform will be installed
- navigate to it and run the following to create a project
yo @olympeio/project
Start the Olympe backend
- start Docker if it is not running already
- run
docker compose up --detach
Initialise the database
Default user/password will be admin/admin
npm run reset
Launch DRAW
npm run serve
Compose with DRAW
Steps detailed version
Install the Olympe Yeoman generator
What is done
Olympe provides package @olympeio/generator-project, a Yeoman generator to help users quickly scaffold a CODE project. The generator installs all dependencies and creates all configuration and runtime files needed to execute Olympe apps and build Olympe libraries.
Instructions
To install it, run
npm install --global @olympeio/generator-project
If you don't have administrator rights on your machine, please install the generator "locally", therefore without the -g option.
Troubleshooting EACCESS errors
If you face EACCESS errors when trying to run the previous command, you probably need to fix how npm is installed on your environment. You'll find more information on the following NPM documentation page: Resolving EACCES permissions errors when installing packages globally
Generate an Olympe project
What is done
- A folder is created locally where the Olympe Platform will be installed
- An empty project is created
- The config file
package.jsonis setup and defines the info about the needed platform dependencies- Olympe dependencies: draw & dev-tools
- Webpack: for running a web server locally
- React
- Runs
npm installto install all dependencies, which means that if later on you edit your config filepackage.json, just run this comman manually to re-download the dependencies that need to be updated.
The generator fetches automatically the compatible versions of DRAW, Olympe runtime.
Instructions
To set up a new project, create an empty directory, navigate to it and call the Yeoman generator:
yo @olympeio/project
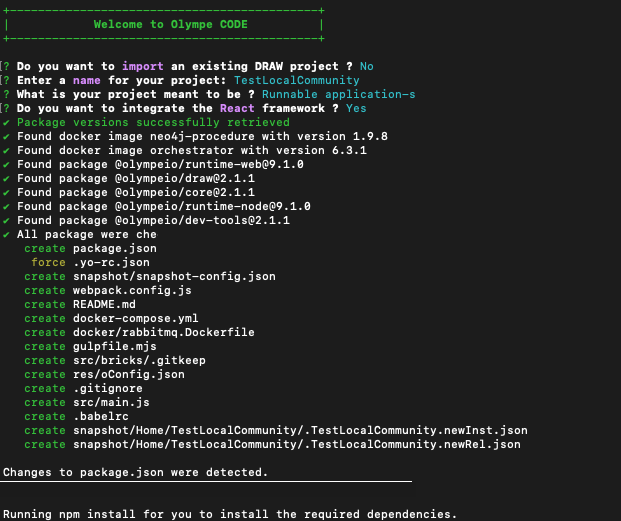
The generator will ask you multiple questions. In the following example, we create a new project from scratch named My Test Project in which we want to create a runnable application without React:

You have the following options when creating a project:
- Create a new project or import an existing project from a server.
- Create runnable applications or a library. Applications may be run directly in the browser whereas a library is intended to provide a set of functions or components that can be used in another project.
- Integrate React framework.
You can always run again the generator later to change options.
Details
Start the Olympe backend
Yeoman automatically generates a descriptor indicating how to retrieve and start an Olympe backend that is necessary to work locally.What is done
- This downloads & launches three docker containers:
- the Neo4j database
- the Olympe Orchestrator
- RabbitMQ
- Creates docker volumes for your data
Instructions
- Make sure docker is running. If not, start it.
- Start the backend
docker compose up --detach
Result
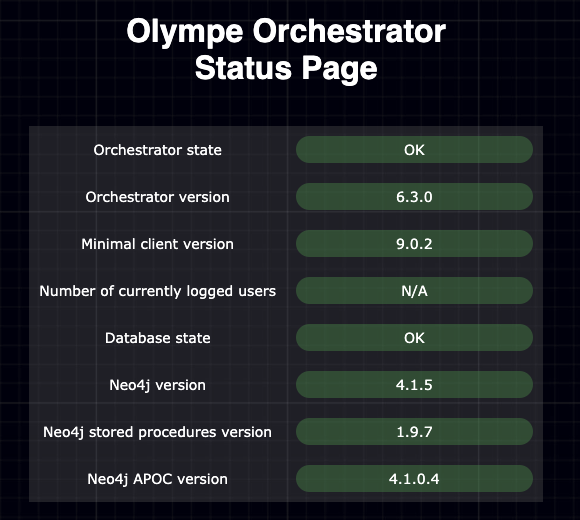
You can check that the Orchestrator is up-and-running by visiting its status page http://localhost:8080/status/
All boxes should be green like below matching the version numbers of your setup.

You can list the docker volumes with docker volume ls.
The volumes used by your project are named like so:
<PROJECT_FOLDER>_backend-neo4j-data
<PROJECT_FOLDER>_backend-neo4j-logs
<PROJECT_FOLDER>_backend-orchestrator-files
with <PROJECT_FOLDER> being the name of the directory in which you create your olympe project.
If you experience an error -- possibly because you have executed the Olympe backend sometime else in the past --, run docker container prune to remove stopped containers. If the problem persists, you will have to remove the container that conflicts using docker stop <hash> and then docker rm <hash>.
If you already ran the installation process for an Olympe project, you can delete any docker volumes that are not used by any container by running docker volume prune. This ensures you do not use volumes of an old olympe project.
Initialise the database
What is done
Once Neo4j and the Olympe Orchestrator are running, you can initialise the database with your new project and a default combination for the user/password that is admin/admin
You will need these credentials to log in to DRAW, please remember these.
See the next tip to choose your credentials.
Instructions
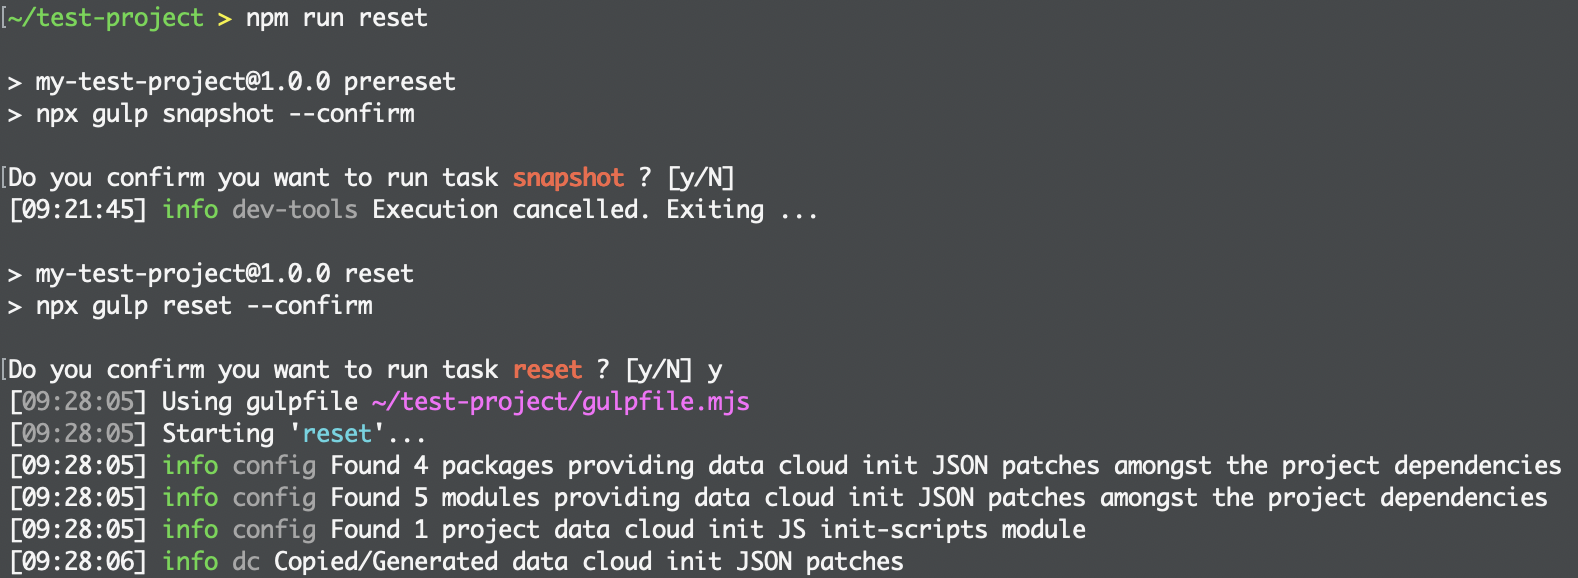
To initialise the database, run:
npm run reset
To use a custom password for your DRAW admin account, execute instead the command with an additional argument:
npm run reset -- --project.userPassword="admin"
replacing admin between the quotes with the password of your choice. Your username still is admin.
This will erase all the content of your Neo4j database. If you have already set up a DRAW project, you should snapshot your project before proceeding. If your database is otherwise empty, you can safely ignore the snapshot step:

Taking a snapshot will dump the content of your project on the data cloud to your local drive.
Details
Launch DRAW
Finally, launch DRAW by runningnpm run serve
Start composing with DRAW
- You can finally visit http://localhost:8888/ to start working in DRAW
- Authenticate with the default user/password
admin/adminor the one you defined in the previous section. - See that the project you created earlier is there
That's all! You can now take a look at our guides and tutorials, and start building a first app and add a first coded function.