Build your first app
This tutorial goes straight to the point. If you want to get more context around what you are doing, take a look at our Guided Overview, or to our DRAW Reference Guide.
This short tutorial will illustrate the capabilities of Olympe:
- How to build apps combining data, logic and UI in record time
- How to share real-time data across apps
It should take around 10-15 minutes to complete. You will build two apps, one for your computer and one for your phone, to allow your phone to control the display of your computer, by changing colors and gradients as you move your finger on the phone. Similar mechanisms can be used to create a game and use your phone as a pad, or to have 2-way interactions from your computer to your phone as well 😀.
Its aim is to allow you to build an app quickly, without spending much time on the underlying concepts. Those can be seen in more details in the Reference guide.
It consists in 4 steps:
- Build the app that will run on your computer
- Build the data model to share data
- Plug the app to the data
- Build the controller app for your phone
Step 1: Create a display app
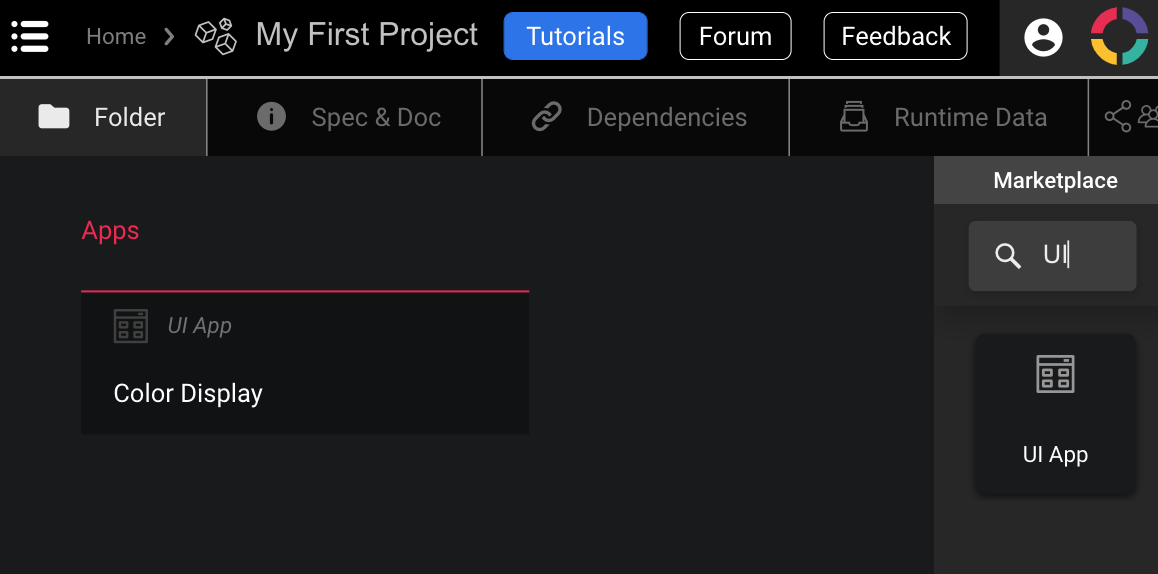
Open DRAW and drag-and-drop a Project from the right sidebar (aka the Marketplace). Name the project with your name. In the example below, for training purposes, "My first project" was the chosen name.
Open the project, and create a new application by drag-and-dropping a UI App from the marketplace. Name the application Color Display.
Build the home screen
Open the UI App. You now see the Screenflow Editor, which allows defining the navigation between the different screens. A Home screen is already available. We only need one screen for this first example. Let's edit it by double-clicking on it.
We are now in the Visual Editor, which allows laying out components such as buttons, labels, forms, maps, etc. For our simple app we will place only two things: a QR Code Viewer and a quote.
Add a colored rectangle
Drag and drop a rectangle on the home screen.

On the bottom left you see the Property Editor, which allows configuring the properties of the rectangle.
In the Layers Editor, change its name to "Quote background".
In the second tab:
- Set
Xto "Left" using the drop down arrow. - Set
Yto "Top" - Set
Widthto 100% using the drop down arrow. - Set
Heightto 100%.

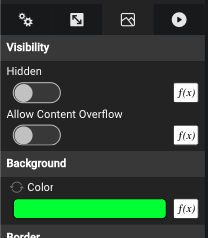
Finally, in the third tab, change the color of the rectangle by setting a Background Color, like the predefined green.
Add a title
Let's add a Label from the Marketplace that will be our title.
In the first tab:
- Set the
Textto "Color App". - Set the
Text Variantto "Heading 3" - Set the
Text Coloras white - Set the
Horizontal Alignto "Center"
In the second tab:
- Set
Xto "Center"
Add a Label
Let's now add a Label from the Marketplace and make it larger. From the Layout Editor, change its name to "Quote".
In the first tab:
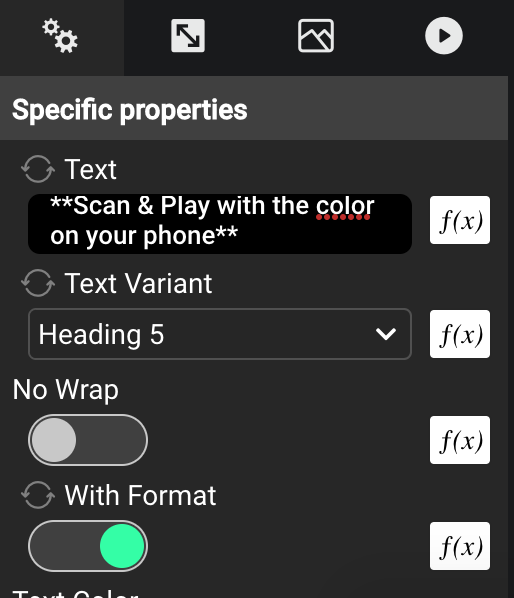
- Set the
Textto**Scan & Play with the color on your phone** - Set its
Text VarianttoHeading 5 - Enable
With Formattoggle - Set the
Horizontal AligntoCenter
In the second tab:
- Set
XtoCenterusing the drop down arrow.
Add a QR Code Viewer
Let's add a QR Code Viewer brick from the Marketplace.
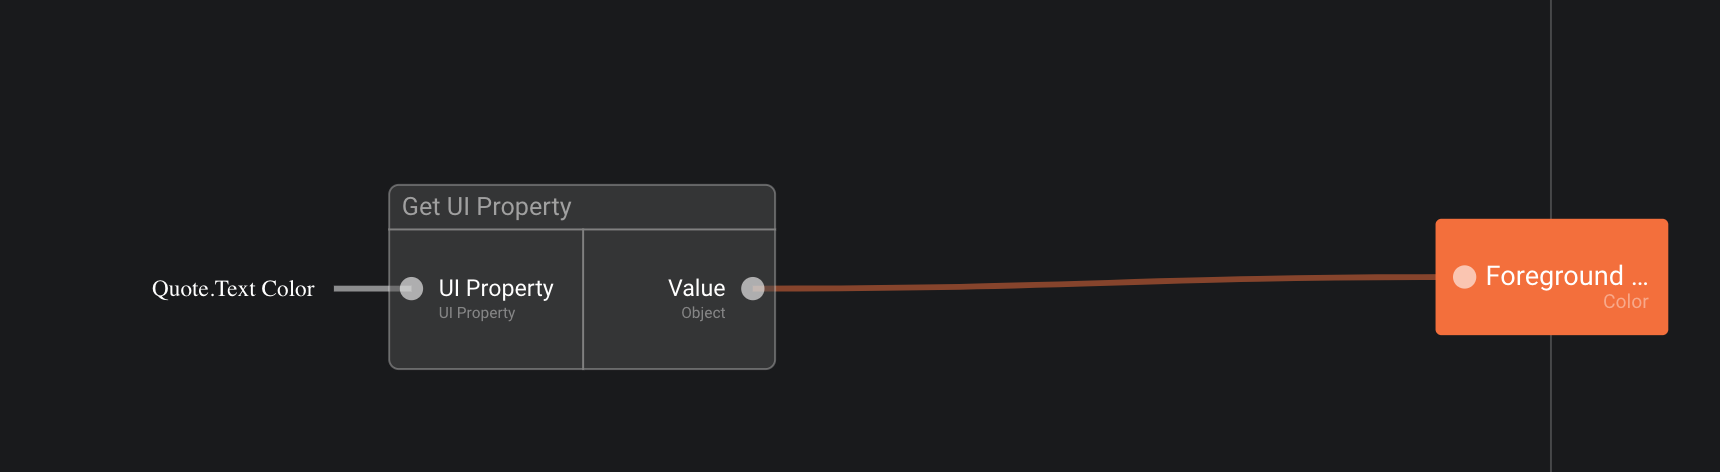
In the first tab, let's create a function for the Foreground color.
- Click on the
f(x)button to open the function. - From the Layout Editor, drag & drop "Quote" onto the screen and select "Text Color" from the list, and press the
Get Valuebutton. - Connect the
Valuefrom theGet UI Propertybrick to theForegroundoutput of the function. - Go back to your
Home screenin theVisual Editor(e.g. using the breadcrumb at the top of the window).
- Select the
QR Code Viewer - In the second tab of the properties: set
Xto "Center"
Let's group
Let's now group the quote and the QR Code Viewer by selecting both components with the mouse.
In the editor's horizontal toolbar, click on Group.
Let's modify its properties by going on the second tab:
- Set
XtoCenter
In the third tab, let's add some CSS property for a better look&feel:
- Set
Radiusto 30 - Add in
CSS Propertythe following CSS code:box-shadow: 0px 10px 30px #00001A - Set Background color to white
Select the QR Code Viewer
- Set
XtoCenter - Adjust its size and vertical position with the mouse so that is roughly vertically centered inside the group and looks good to you
- Do the same with the Quote
Make the quote the same color as the background
- Select the Quote label
- For its
Text Colorproperty, click on thef(x)button to open the function. - From the Layout Editor, drag & drop "Quote background" onto the screen and select
Default Color (Color)from the list, and press theGet Valuebutton. - Connect the
Valuefrom theGet UI Propertybrick to theText Coloroutput of the function. - Go back to your
Home screenin theVisual Editor(e.g. using the breadcrumb at the top of the window).
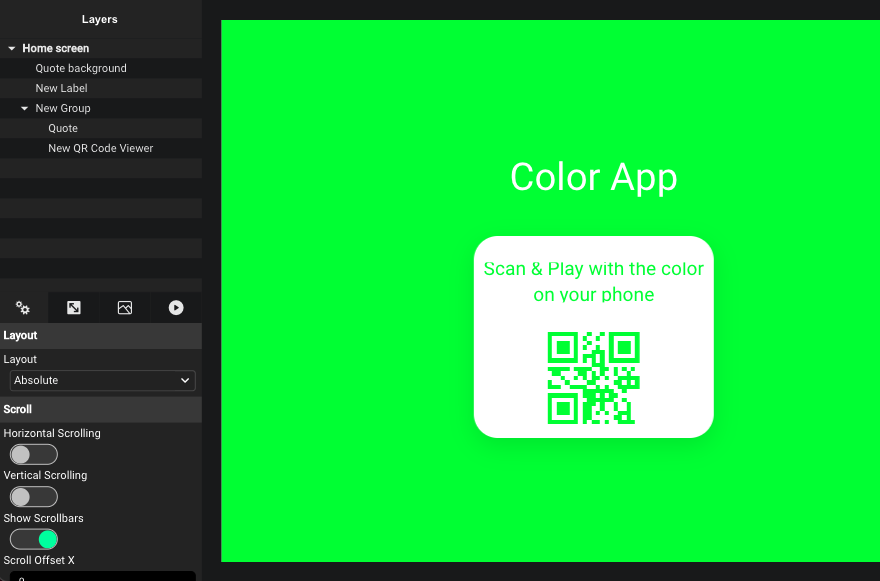
The first step is completed! This is what you should end up with:
We will come back to these components after we define our Data Model.
Step 2: Build the data model to share data
Now that the display is built, let's make it a bit more dynamic. The color of the rectangle will no longer be set as an absolute value in DRAW, but it will be controlled by another app running on your phone. The goal will be to change the color on your browser by moving your finger on your phone.
This is done by sharing data between your phone and your browser, using your finger will act as a pointing device. We will therefore call this shared data a Finger Position. Our first Finger Position will simply store the coordinates of your finger as x and y.
Create a data model
Go back to your project (e.g. using the breadcrumb at the top of the window).
Drag and drop a Data Model into your project, and name it Finger Position Data Model.
Open it, and from there you can create a new Data Type.
A data type is like a class in an object oriented programming language, or like a table in a SQL database.
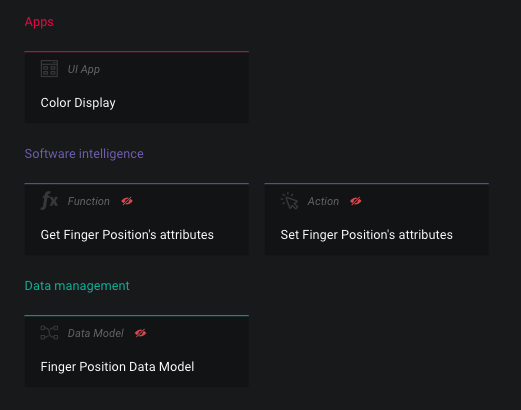
Create the data type by drag and dropping a
Data Typebrick from the marketplace on the right of the window.
Rename it to Finger Position.
Add two Number properties by drag and dropping two Number bricks from the marketplace onto the Properties section of the Finger Position. Name those properties
xandy.
Now that we have created a data model, we need some getter and setter functions to interact with it.
Let's generate two bricks: Get Finger Position's attributes and Set Finger Position's attributes, by using the Generate helper bricks... menu from the dropdown (clicking on the 3 vertical dots) on the Finger Position data type.
- select "My first project" as you target folder
- press the "Save" button
- check the Getter & Setter Property/Relation
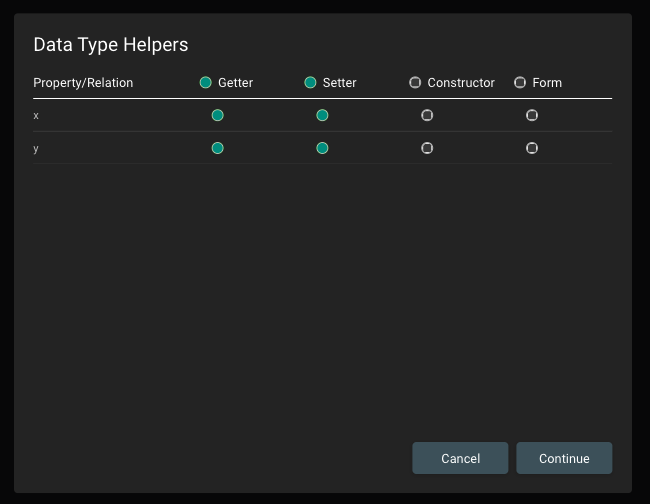
- press "Continue" and then "Close" once done
- go back to your project (e.g. using the breadcrumb at the top of the window)
- you now have 2 new functions to get and set the Finger Position values
Create a finger position
Let's now create an actual finger position instance. This is done by creating a new Static Data Folder in your project, and creating a new entry. This is like creating a new instance of our finger position class, or like adding a new row in our finger position table. You can initialize the values of x and y to something between 0 and 250.

Create a function to retrieve the finger position
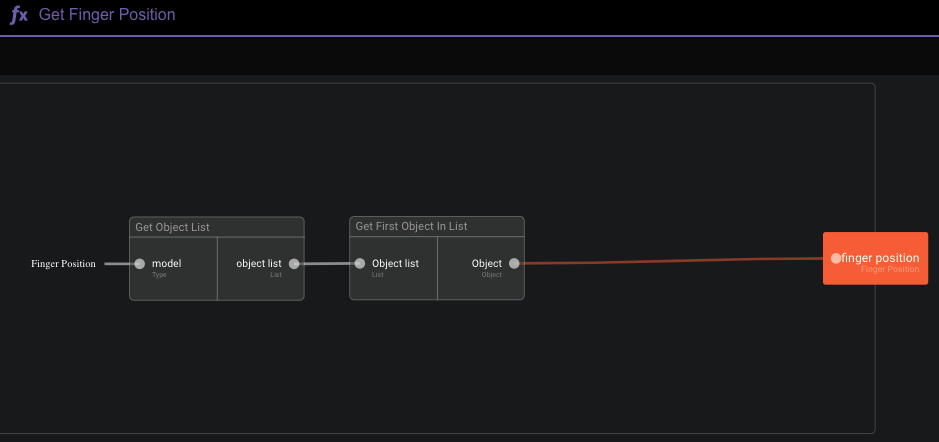
We now need just a way to retrieve the finger position. One way to do it is by creating a new Get Finger Position brick. This is done by adding a new Function to your project. Drag & drop a Function brick from the Marketplace to your project.
Opening the function opens the Function Editor, where you'll be able to define the behaviour of the function by plugging bricks together. The first thing to do is to define the output or our function: we want to retrieve our finger position. Let's therefore create one output of type Finger Position.
Then in order to get that value, in our simple case we will simply get the list of all finger positions, and then get the first element in that list. Drag and drop the Get Object List brick from the marketplace on the right, and set model to finger position. Then add a Get First Object in List brick and connect the two. Finally, connect the output of Get First Object in List to the output of the function.
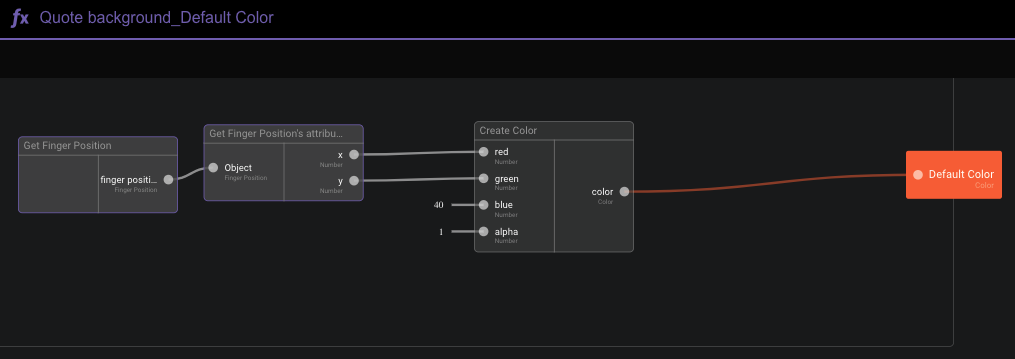
Step 3: connect the UI to the data to set the color
- Go back to your
UI App, open itsHome screen - Select the
Quote background - In the 3rd tab for the
BackgroundColorproperty, click onf(x). Define the function as shown below i.e. reuse the bricks you have created earlier from the Marketplace,Get Finger Position,Get Finger Position's attributes
Step 4: Add a picture
For building our second screen for our Application, let's add a picture that will be later used in that screen.
Let's go back to the root of our Project and drag & drop a Media Library brick from the Marketplace.
Inside, we will add a finger picture by clicking on the + button on the top left. You can use this image to download and to upload it inside the Media Library.
Step 5: Build the controller app for your phone
We now have just one step to go: if we change the finger's position attributes in the Static Data Folder, the color changes. Let's now build an app that will update the position using our phone and our finger.
In the project view, create another UI App called Controller. This app is very simple, with one Touchpad and one Label. We also an Image to make it look nice.
- Open the app's screen, and add a new
Touchpad. - In the
Layer Editor, rename it to "Touchpad". - In the second tab:
- Set
Xto "Center" - Set
Yto "Middle" - Set
WidthandHeightto 95%
- Set
- In the third tab:
- Set
Border Widthto 2 - Set
Border Colorto the predefined light blue - Set
Radiusto 20
- Set
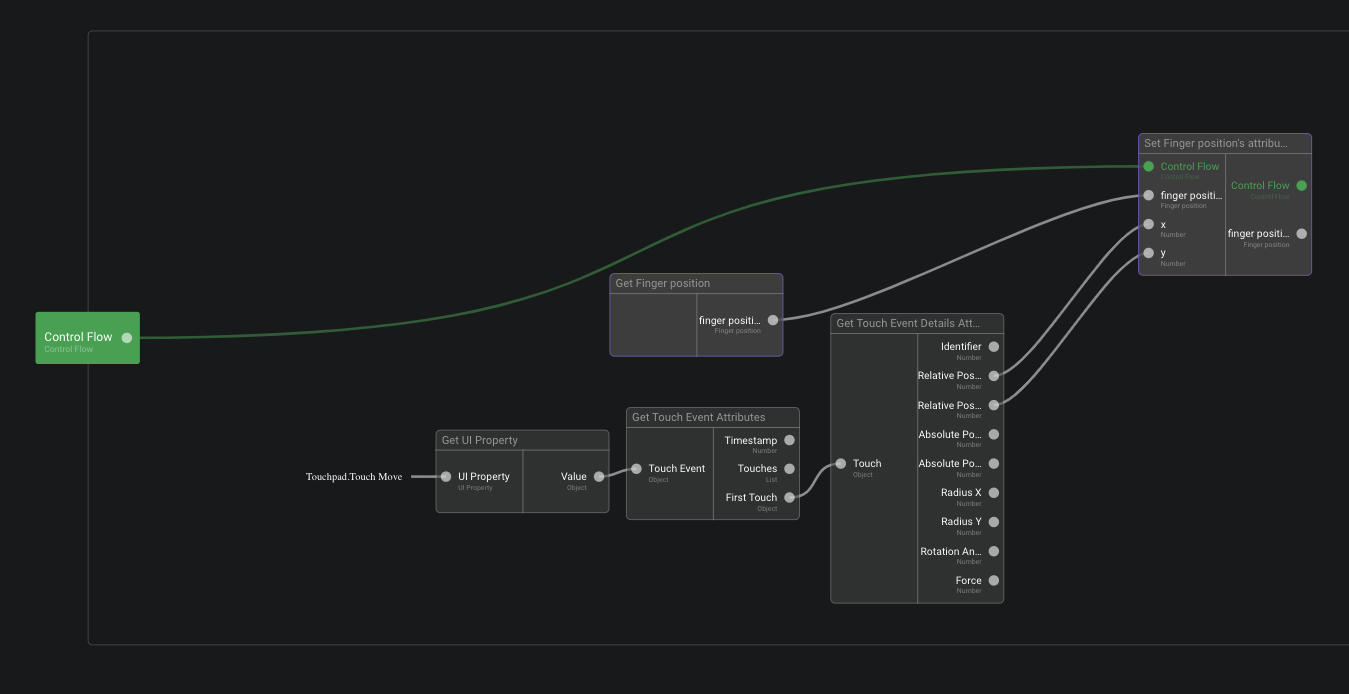
Our touchpad will capture the touch events when we move our finger. On the fourth tab of the property editor we can make all possible interactions with our button. The one we are interested in here is On Touch Move. Click on the f(x) icon to add some logic as seen in the image below:
Add user instructions to the controller
We will use the image that you saved in the Media Library.
- Go back to your Controller's Home Screen
- Drag & drop an
Imagebrick from the Marketplace. - In the first tab, click on
Imageand select the image that you've uploaded. - In the second tab, set
Xto "Center",Yto "Middle". - With your mouse resize it to make is visually fill up most of the Touchpad
Let's add a Label from the Marketplace with instructions.
- In the Layout Editor, rename it to "Label".
- In the second tab:
- Set
Xto "Center" - Set
Yto "Bottom" - Set
Widthto 100% - Set
Heightto 60
- Set
- In the first tab:
- Set the label's
Textto "Drag your finger to change the color" - Set
Text Variantto "Heading 5" - Choose a color for the
Text Color(for example, the predefined blue)
- Set the label's
Step 6: Setting the QR Code of the Controller
We now need to have the Color App's QR Code point to the Controller app's URL.
That way, we just need to execute the Color Display app, which will present the QR Code of the Controller to the end user so that we can scan it and execute the Controller on a phone.
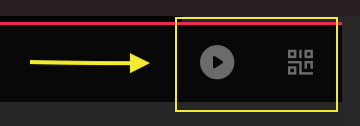
- In your project for the Controller App, run it in your browser with the play button shown below

- Copy its URL parameters following the web site extension.
- e.g. if you are on the Community the URL will look like this
https://community.fluidapp.io/?hc.app=sc.runtime&sc.app=0181819b988db7e76a87 - You need to copy
/?hc.app=sc.runtime&sc.app=0181819b988db7e76a87
- e.g. if you are on the Community the URL will look like this
- In the Color Display app, select the QR Code Viewer
- For its
Valueproperty, selectf(x) - Implement the logic to look like this, using
server.hostas the string input value for theGet Parameterbrick, and the string copied above in theConcatbrick for thes2input: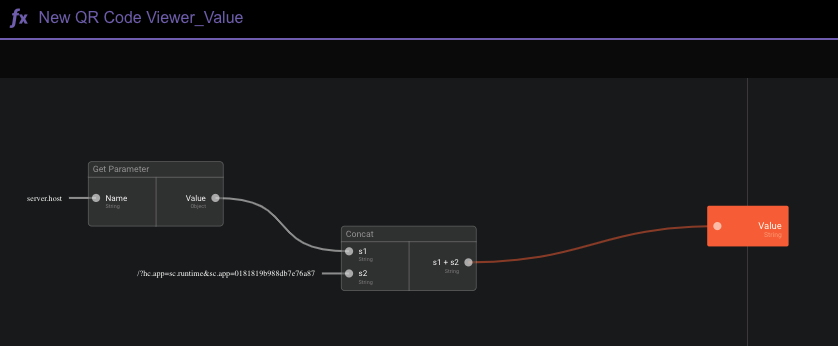

Trying it out
Option 1: load the Color Display app on your desktop
If DRAW is deployed:
- On the Community the url will look like this
https://community.fluidapp.io/?hc.app=sc.runtime&sc.app=018180a79b480d2330c9 - On a server, the URL of DRAW in your browser is like this
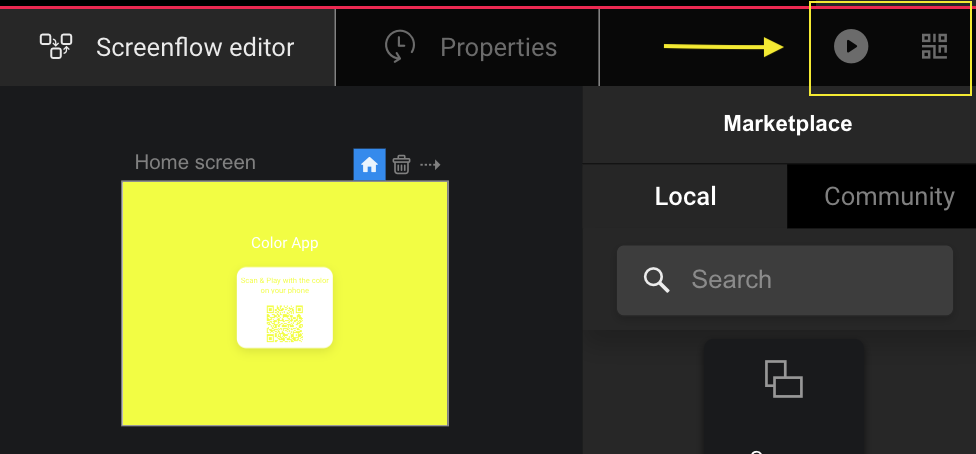
https://some_domain_name.com/ - Load the Color Display app in your desktop browser with the play button shown below
- Scan the QR Code the app generates using your phone's camera (some Android phones may require a dedicated QR scanning app).

Et voilà! When you move your finger on your phone, you change the color in your browser.
If you have deployed DRAW locally (i.e. the URL of DRAW in your browser is like https://localhost:8888/...), you can still load the app on your phone if your phone is connected to the same wifi network. Find out your IP address (Windows, Mac) and use that address in your browser in place of localhost. For example if your IP address is 192.168.0.2, enter https://192.168.0.2:8888 in your browser. From there, use the Share menu entry of the Controller app to display a QR Code which you can scan with your phone's camera.
Option 2: load the Controller in your browser
Using your browser: open the Controller app and activate the touch mode:
- Chrome: Menu (3 dots) -> More tools -> Developer Tools -> Click on the little phone at the top left.
- Firefox: Menu -> Tools -> Web Developer -> Responsive Design Mode, and make sure "Touch Simulation" is enabled.
Improve the Controller
You probably noticed that your finger changes the color on the top left of the screen, but once it moves to the bottom right quadrant the color remains white. This is because we simply plugged the position into the color: color components are between 0 and 255. Any position beyond 255 will therefore be converted to a color component of 255. As your phone has a resolution of more than 255x255 pixels, a significant amount of space is considered as white.
This can be resolved by normalizing the position depending on the actual size of the phone's screen. You can create a new function for this functionality. Then use it within the Controller app, in the On Touch Move function.
As a result, the finger position attributes always remain between (0,0) and (255,255), and the color change is continuous across the whole screen of the phone.
Next steps
Congratulations! You have built with first app using Olympe DRAW and it looks great!
Continue with the next tutorials to take your development skills further!