Write Transactions and Queries
The goal of this tutorial is to help you write code to manipulate data using the CODE API.
We must start from a Data Model, and will use the following example. A Person has an Address, as well as one or several Pet.

Beyond the examples below, refer to the API documentation for more details. Alternatively, you can view the documentation from your favorite editor:
- Base API: the core concept of the CODE API can be found in your project under the
base.d.tsfile in@olympeiomodules. - Cloud API: the CRUD operations (how to Create, Read, Modify and Delete data) of the CODE API can be found in your project under the
cloud.d.tsfile in@olympeiomodules.
Generate the JavaScript classes
Using Olympe data types within code requires generating the corresponding JavaScript classes.
- Create a new Data Model with these 3 Data types, their relations and attributes
- Create the 3 JS classes corresponding to these data types. You can do so by clicking the three dots, and “Generate JS class”. This gives you 3 files:
Address.js,Pet.jsandPerson.js. - Store these files in a suitable folder so that you can reference them from your coded bricks.
- Create a coded action brick where we are going to write & execute transactions. Place it appropriately, so it can be built with your project.
- In the JS class for your coded action, import the relevant data type classes.
Write the code excerpts presented below in the update method of your coded action brick.
Let's now see how to create instances and relations between them.
Transactions: Create and Update Data
Create an Instance Without Properties
- Import the
Transactionclass in your hardcoded brick file. If your IDE did not do it automatically, addTransactionto the list of imported symbols from'olympe' - Import the
Addressclass that you exported in the previous section.
import {ActionBrick, registerBrick, Transaction} from 'olympe';
import Address from './datatypes/Address'; // Adjust to the correct location
Let's start with a simple example on how to create a first instance for the Address data type.
const t = new Transaction(false);
Address.create(t);
t.execute().then(() => forwardEvent());
Let’s unpack this example. new Transaction(false) creates a new transaction. The false value disable the auto-persist. Address.create(t) creates the empty instance (i.e., without any properties set) of Address in the transaction t. Finally, the asynchronous call to execute() completes the transaction.
One should process the success / the failure of the transaction using the Promise style. The .then callback is executed when the transaction succeeds and the .catch callback is executed when the transaction fails. In our case, the transaction triggers the output control flow of our coded action brick once the transaction succeeds.
Address.create(t) is equivalent to t.create(Address)
Create an Instance With Properties
In this section, we see how to give properties values to an Address instance we create.
Set the properties directly at the instance creation with transaction.create(dataType, propertiesMap)
const t = new Transaction(false);
const properties = new Map();
properties.set(Address.nameProp, 'Lausanne');
properties.set(Address.zIPCodeProp, 1007);
t.create(Address, properties);
t.execute().then(() => forwardEvent());
At instance creation, properties can be transferred via a Map to the instance creation operation. Multiple equivalent ways to do so exist. The following are equivalent:
t.create(Address, properties)
const newTag = t.create(Address);
t.multiUpdate(newTag, properties);
const newTag = t.create(Address);
t.update(newTag, Address.nameProp, 'Lausanne');
t.update(newTag, Address.zIPCodeProp, 1007);
const newTag = t.create(Address);
Address.setName(t, newTag, 'Lausanne');
Address.setZIPCode(t, newTag, 1007);
The other ways are equivalent and use the methods update and multiUpdate, or the static setters provided by the Address class. All methods update the given instance (the newTag parameter), provided the values as the next arguments.
Update Instance Properties
As shown in the previous section, an instance properties can be updated. It is possible to make an update on any instance (new or already existing), provided the instance or its tag. The method update requires the instance, its property we want to modify, and the new value of it. In the case of multiUpdate, the arguments are the instance, and then a map having properties as keys.
Update an instance with the update and multiUpdate operations.
Examples:
transaction.update(tag, property, value);
or
transaction.multiUpdate(instance, propertiesMap);
or using the pregiven setters of the form:
<ClassName>.<setPropName>(transaction, instance, value)
All transaction APIs accept either tags or full instances. Why both? Because when we are within the transaction, the instance does not exist yet!
In the case of a new instance:
const newAddressInstanceTag = t.create(Address);
// The instance will only exist once we execute the transaction, so we use the tag
t.multiUpdate(newAddressInstanceTag, properties);
Using an existing myAddress instance:
// The instance exists, so we use the instance
t.multiUpdate(myAddress, properties)
Create Relations
Let's now look at how to link instances with each other using the relations defined on our data types.
The next example will create an Address and a Person, and link the former to the latter with the relationship Person.address.
The createRelation methods takes 3 arguments in this order: the relation to create, the instance the relation starts from, the instance the relation ends at.
const t = new Transaction(false);
const addressProperties = new Map();
addressProperties.set(Address.nameProp, 'Lausanne');
addressProperties.set(Address.zIPCodeProp, 1007);
const newAddressTag = t.create(Address, addressProperties);
const newPersonTag = t.create(Person);
t.update(newPersonTag,Person.nameProp, 'Jane')
    .createRelation(Person.addressRel, newPersonTag, newAddressTag)
    .execute().then(() => forwardEvent());
Transaction.create(...) returns a string tag whereas other operations on transactions return the modified transaction. DO NOT chain calls to transaction.create()
Use the returned string tag to create relations between instances, modify the objects, etc...
Let us do a more complex example with more relationships. We create multiple Person, Address and Pet instances.
const t = new Transaction(false);
const addressProperties = new Map();
addressProperties.set(Address.nameProp, 'Lausanne');
addressProperties.set(Address.zIPCodeProp, 1007);
const newAddressTag = t.create(Address, addressProperties);
const personTag = t.create(Person, new Map([[Person.nameProp, 'Alice']]));
const firstPetTag = t.create(Pet, new Map([[Pet.nameProp, 'Rex']]));
const secondPetTag = t.create(Pet, new Map([[Pet.nameProp, 'Puss']]));

t.createRelation(Person.addressRel, personTag, newAddressTag) // Link person to address
    .createRelation(Person.ownsRel, personTag, firstPetTag)   // Link person to first pet
    .createRelation(Person.ownsRel, personTag, secondPetTag); // Link person to second pet
    .execute().then(() => forwardEvent());
- save tags of new instances to re-use them for other operations
- chain transactions operations other than
create
Update or Delete Relations
Relations cannot be updated per se. They must be deleted and recreated. The example below illustrates a Pet which is switching owners.
// Owners are in variable firstOwner and secondOwner
// Pet is in variable myPet
const t = new Transaction(false);
t.deleteRelation(Person.ownsRel, firstOwner, myPet)
    .createRelation(Person.ownsRel, secondOwner, myPet);
A person moving to a new address could be handled as follows:
// Owner is in variable owner
// New address is in variable newAddress
const t = new Transaction(false);
t.deleteAllRelations(Person.addressRel, owner);
    .createRelation(Person.addressRel, ownser, newAddress);
Reusing an Existing Transaction
Let's imagine a coded brick called Create Person and Pet which creates a Person, its Address and a Pet and links the three together.
In a scenario where we need to create many such instances, we would want to reuse the same transaction. In pseudo code, instead of doing:
foreach (...) {
    // Each function call will create its own transaction
    createPersonAndPet(personName, personAddress, petName, petSpecies);
}
We would rather create all instances at once within a single transaction:
beginTransaction()
foreach (...) {
    // Each function call will reuse the existing transaction
    createPersonAndPet(personName, personAddress, petName, petSpecies);
}
endTransaction()
This can be achieved by using Transaction.from($) instead of Transaction.create(). For example:
const t = Transaction.from($);
const properties = new Map();
properties.set(Address.nameProp, 'Lausanne');
properties.set(Address.zIPCodeProp, 1007);
t.create(Address, properties);

Transaction.process($, t).then(() => forwardEvent());
Let’s unpack this example. Transaction.from($) gets an existing transaction, or creates a new one. If there is an already existing transaction in this context (think of Begin/End bricks starting a transaction), you’d get this transaction from Transaction.from otherwise, a new one is created. The $ symbol is the update argument containing the Brick Context.
from/process vs. new/execute
So we have two ways to create transactions:
- Initiated with
Transaction.from($)and processed withTransaction.process($, t) - Created with
new Transaction()and executed witht.execute()
When shall we use one or the other?
from/process | new/execute | |
|---|---|---|
| Timing | The transaction could be executed when process is called, or later, when a calling function ends a transaction. | You know that the transaction is executed once execute is called, and have the guarantee that objects have been created/updated/deleted once the call completes, which may be a prerequisite for subsequent processing. |
| Genericity | The brick could be combined with other bricks within a bigger transaction. This is most often applicable for smaller, more generic bricks which could be called in different contexts. | Larger, more complex coded bricks performing a specific task typically use the new/execute API. |
| Code vs. DRAW | from/process allows combining operations in DRAW and in coded bricks within a single transaction. It is typically the pattern used in the Set Object Property, Create Relation, in workflow process functions, etc. | The brick runs, creates a new transaction, executes it, and that's it, it's done. It is self-contained and independent from the other bricks. |
Persisting Instances to DB
By default, objects are created locally, i.e. in the browser or node.js process memory. Storing them in the database requires to persist them. This can be achieved in several ways:
- Upon creation, the transaction constructor takes a boolean parameter:
new Transaction(false)means that new instances are not persisted by defaultnew Transaction()or equivalentlynew Transaction(true)means that new instances are persisted by default
persistallows setting the persistance of one specific instance.
Once an instance is persisted, all updates are automatically saved to the database as well.
Check the v2.5 release notes that introduced this new API for persistance manipulation.
Queries: Fetch and Read Data
You must import the Query class for this part in your hardcoded brick file
Let us retrieve with Queries data we created in the previous example. This section is covered by the class Query in the cloud.d.ts API.
A Query in Olympe is a graph query builder. The graph on which the query operates is made of nodes. For a simple and quick understanding, each CloudObject or data type instance is represented by a node. Example of relations between nodes can be the relations we created in the last example. When creating a Query, you will first define which nodes in the graph it starts from. Let us examine that through an example.
The query Query.from(personTag).follow(addressRel) defines the starting node(s) to be the instance with the tag personTag. When following a relation with a query, the specified relation leads to a new set of one (or many) node(s). In our example, following the addressRel relation leads you to the node with tag newAddressTag.
A Query selects instances part of a path in the graph. It uses a specified starting node and defines paths from this starting node with relations.
The Query can start from multiple nodes, see here
Query Results
The execution of queries will retun objects of type QueryResult. It represents the result of a query, and contrary to our old API, it is de-correlated from the Query, i.e., if the Query is updated, any result we got beforehand does not change.
A query result is a list of key-values pairs. The values are instances of a data type, and they satisfy the conditions imposed by the query. The keys are the tags of the corresponding value instance(s).
QueryResult is de-correlated from the Query that generated it. Manipulate it easily as an independent result object.
Operations on Query Results
Multiple operations exist in the Cloud (cloud.d.t.s) API to use a QueryResult.
From an executed Query, you get a QueryResult, e.g., myQueryResult. How to use this object?
To simply get the result instances from the query:
const myInstances = myQueryResult.toArray();
This method yields an array with the instances without any pre-processing. Multiple methods allow you to obtain a transformed result array:
const withoutFirstElement = myQueryResult.shift();
const withoutLastElement = myQueryResult.pop();
const mappedElements = myQueryResult.map(callback);
const reducedValue = myQueryResult.reduce(reducer);
More transformations exist: check the Cloud API under QueryResult (cloud.d.ts).
Get new modified result arrays (the operations do not modify the query result itself!) with various operations such as : map, reduce, sort, etc...
Query Instances of a Data Type
We present here a very common pattern in the Olympe environment: retrieving the instances of a Data Type.
For this example, we retrieve all the instances of a Person:
const myInstancesQuery = Query.instancesOf(Person);
A data type is the only argument necessary to write this Query. A Data type, in the context of our example, is just the name of a JS class whose boilerplate code was generated from DRAW.
Do not forget to import the class whose name you use in a Query where the query is written.
Query.instancesOf(Person) is equivalent to Person.instancesOf() but more concise!
Query Relations Between Data Types
As introduced earlier, the class Query is a graph query builder. We examined through two examples how to start a Query. Remember the code to do so:
const query1 = Query.from(childTag);
const query2 = Query.instancesOf(Person);
The next step is to define a path in the graph, where each step is done by following a relation. For example:
const query1 = Person.instancesOf().follow(Person.ownsRel);
const query2 = Pet.instancesOf().follow(Person.ownsRel.getInverse()).follow(Person.addressRel);
The first query retrieves the instances of the Person data type, and follow the ownsRel as a first path step. The result contains all the pets owned by anyone.
The second query retrieves all the pets, finds their owner, finds the address of the owners. The result contains all the addresses in which pet owners live. Note the relations of pet ownership is followed in the opposite direction.
Use follow(myRelation.getInverse()) to follow a relation A->B from B to A.
Queries will check if a path (relation) exists between 2 types when using follow() or followRecursive().
For example if we use an incorrect relation like this: Pet.instancesOf().follow(Person.addressRel).
Upon execution we will get the following error: The specified relation (address) is invalid at the current level (type: Pet) of the Query you are building. Please make sure you did not forget a .back() or another relation.
Join Operations
Up to this section, queries always return the result at the end of the path the queries define. With the andReturn() operation, one can set what instances are part of the result.
For the sake of our example, assume that Jane has two pets, Bob has one and Alice has zero.
The query :
const query = Person.instancesOf().andReturn().follow(Person.ownsRel).andReturn();
specifies that both the owner and the owned pet are returned. For our example, the results are going to be:
result = [['Jane', 'Rex'], ['Jane', 'Rouky'], ['Bob', 'Rufus']];
Notice that Alice does not show up in the result, as she does not own any pet. It is also possible to only return the pet owners, without the pet. The query and its result are then:
const query = Person.instancesOf().andReturn().follow(Person.ownsRel);
result = ['Jane', 'Bob'];
Multiple noticeable details:
- having 2
andReturnoperations simulated a join between pets and owners on the ownership relation. - when multiple
andReturnare used, theQueryResultvalues array is a list of tuples. If there are only one type of instances returned, the values array is a list of instances! - using a
follow()operation after anandReturnoperation means that only nodes that are participating in the relation specified byfolloware returned.
- use multiple
andReturnto simulate JOINs - filter nodes based on relation participation using combinations of
andReturnthenfollow
Apply Filters, Sort and Limit Operations
Let us go through some other examples and operations that can be applied on queries:
Query.instancesOf(Person).filter(Predicate.contains(Person.nameProp, 'ane', false)).andReturn().follow(Person.ownsRel);
This query filters all the Person instances that do not contain the substring 'ane', the new result value array is: ['Jane'].
To make a predicate, import the Predicate class from 'olympe' and use the various propositions: greaterThan, contains, equals etc...
Predicates usually act on the property of instances, which has to be specified in the predicate. They can be composed with Predicate.and, Predicate.or and Predicate.not operators.
Similarly, operations like sort and limit can be defined. sort is made using one property, and the symbols from Order (importable from 'olympe') can be used to specify in which direction the sort is applied.
- The
limitoperator applies to the final list of result, not to an individual level. Only calllimitonce perQuery. - The
sortByoperator can be applied only once on aQuery. Multiple call make the previous one not have any effect. Only callsortByonce perQuery.
Query Execution
This section explains how to transition from a Query to a QueryResult.
In the Cloud API (cloud.d.ts), in the Query class one can see three methods returning a QueryResult:
query.executeFromCache(): QueryResult
query.execute(): Promise<QueryResult>
query.observe(): Observable<QueryResult>
The three methods differ in two main aspects:
- the data on which the query is executed
- when the result is available
The method executeFromCache() returns synchronously a QueryResult. The query is executed immediately with the data present in the local cache of your browser, i.e., data that has already been fetched by your application in the past, or that has been created locally.
The method execute() returns a Promise<QueryResult>. The obtained QueryResult can be obtained asynchronously with the JS Promise-style callbacks : then((queryRes) => {...}) for a successful query, .catch((messageError) => {...}) for an eventual failed Query. The query is executed by the entity responsible to persist the data on which the query is made. This way, you ensure that if any other Olympe VM made a change to your data and persisted it, your query will see that change.
The method observe() is similar to execute(): it is the same entity that resolves the query, but this entity will watch for changes on the data on which the query is executing. If a change was to happen, another QueryResult is pushed to the Observable.
A Step Further
Now that you have gone through this first exercise, let's go through an extension.
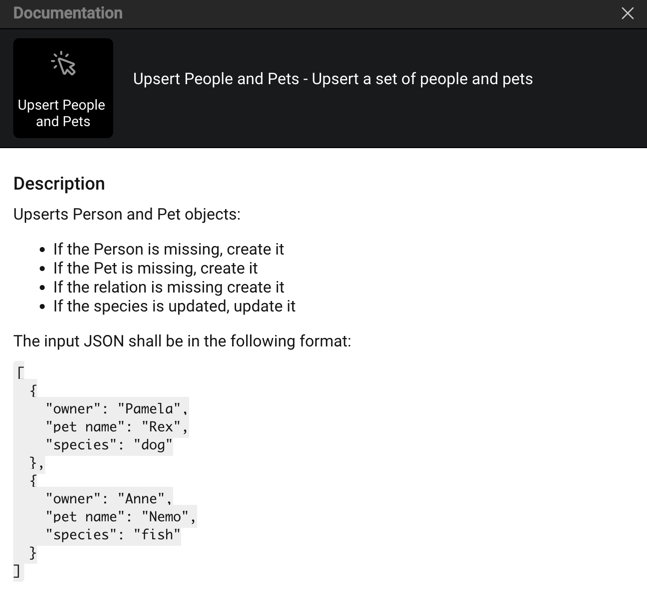
Create a brick that takes the following JSON as an input, and performs the following:
- If the Person is missing, create it
- If the Pet is missing, create it
- If the relation is missing create it
- If the species is updated, update it
Here is the signature of the brick:
The inputs and outputs are:

You can use the following dataset as input. This should lead to:
- There are 3 persons: Pamela, Anne, Pierre
- There are 3 pets: Rex the dog, Nemo the turtle and Brutus the hamster
- Pamela owns Rex, Anne owns both Nemo and Brutus, and Nemo is owned by both Pierre and Anne
[
    {
        "owner": "Pamela",
        "pet name": "Rex",
        "species": "dog"
    },
    {
        "owner": "Anne",
        "pet name": "Nemo",
        "species": "turtle"
    },
    {
        "owner": "Anne",
        "pet name": "Brutus",
        "species": "hamster"
    },
    {
        "owner": "Pierre",
        "pet name": "Nemo",
        "species": "turtle"
    }
]
Then you can check that the update works properly by processing the following input. This should lead to the following changes:
- Pamela has a second pet: Puss
- Nemo is actually a fish, not a turtle.
- There is a new Person (Bahj), and a new Pet (Nilti)
[
    {
        "owner": "Pamela",
        "pet name": "Rex",
        "species": "dog"
    },
    {
        "owner": "Anne",
        "pet name": "Nemo",
        "species": "fish"
    },
    {
        "owner": "Pamela",
        "pet name": "Puss",
        "species": "cat"
    },
    {
        "owner": "Anne",
        "pet name": "Brutus",
        "species": "hamster"
    },
    {
        "owner": "Pierre",
        "pet name": "Nemo",
        "species": "fish"
    },
    {
        "owner": "Bahj",
        "pet name": "Nilti",
        "species": "dog"
    }
]